Windows Service Install Guide
Overview
EMS Loop consists of three (3) distinct components, Windows CAD Connector services installed on your network accessible to your CAD database, EMS Loop Website and the EMS Loop Mobile applications.
For EMS Loop to connect to your CAD system and provide services that interact with your system, the mobile app and the EMS Loop customer website, the Windows CAD Connector services need to access your CAD database. This guide covers the installation and configuration of the EMS Loop CAD Connector Services (herein referred to as the Services).
These services are the bridge between the EMS Loop website and the mobile devices. They monitor your CAD for new runs and also provide information back to your CAD in the form of vehicle locations, timestamps, history items, trip sheets and mileage calculations.
General Requirements
The following are the general requirements for the server that you’re going to install the services on and are required for EMS Loop to function properly.
SQL Server 2012 R2 or later (this is for the CAD Database server only, there is no requirement for the services to have an SQL Server installed, the services do not utilize a SQL Server to store information only to read information from your CAD)
SQL Server service broker enabled for the databases required for your CAD System (see the “Database User Guide” for further information on the SQL Service Broker)
.NET Framework 4.6.2 or later
The machine you install on must be one of the following operating systems
Windows 10
Windows 11
Windows Server 2012
Windows Server 2012 R2
Windows Server 2016
Windows Server 2019
Windows Server 2022
Services require access to the internet over port 80 and 443 for outbound initiated connections.
For installation and services control administrative access is required.
Before You begin the install
Make sure that you have obtained your customer ID and API Keys from EMS Loop, both items are required during the installation process.
Installation Media
The installer will automatically check to make sure that you have the latest released version of the installer when you launch the installer. This ensures that you’re up to date with the very latest at time of installation.
Installation
When you launch the installer, it will check to make sure that you’re using the latest released version, once it confirms you have the latest, you’ll be presented with the setup wizard as shown in Figure 1.
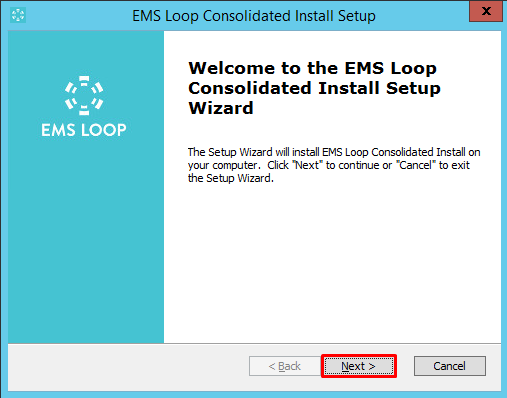
Figure 1
Click the next button to continue through the installation process, by accepting the license agreement through the next step.
In the following dialog you’ll be accepting the License Agreement. Please refer to your contract for service.
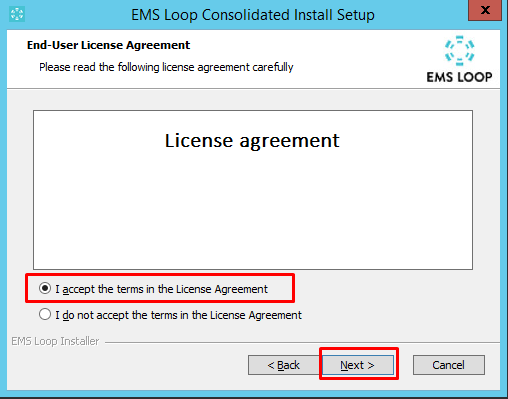
Figure 2
Accept the license agreement by selecting the “I accept the terms in the License Agreement” radio button as shown in Figure 2 and click next to continue with the installation and proceed to the feature selections.
In this step you’ll be selecting the correct options for the CAD that you use as shown in Figure 3 which is configured for ZOLL CAD. Install the appropriate services for the CAD that you’re using within your organization. Then click next to continue with the installation.
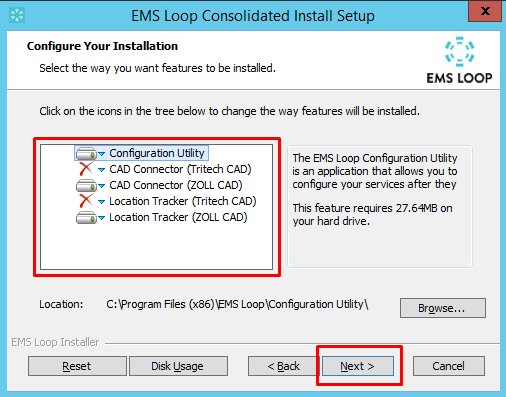
Figure 3
The installer will now attempt to locate the available SQL Servers on your network. If it finds any it will populate the server drop down list so that you can select your CAD SQL Server from the list. You also have the option to type in the SQL Server that your CAD Database is located on.
Once you have selected the correct SQL Server for your CAD system (the server can also be manually entered if it is not discovered), enter the login information that you would like EMS Loop to use to connect to your database shown in Figure 4. Currently, EMS Loop does not support the use of Windows integrated authentication you must use a SQL Server user.
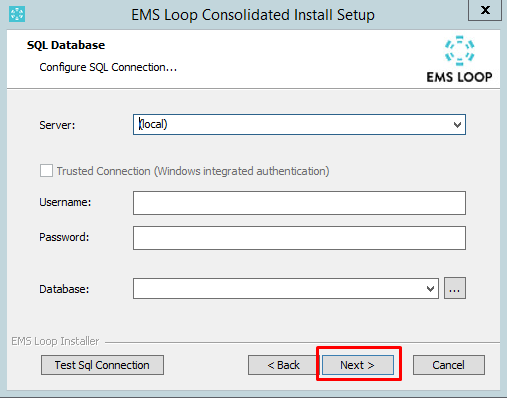
Figure 4
Once the username and password have been entered, click the ellipsis next to the database dropdown to obtain a list of the available databases on the selected database server. Select your CAD database and then click the “Test Sql Connection” button to confirm that you can connect to the database and then click “Next”
The Service Configuration screen is where you will use the Customer ID and API Token you have received from EMS Loop. Enter your given API Token and Customer ID int the fields provided (highlighted in yellow) shown in Figure 4.
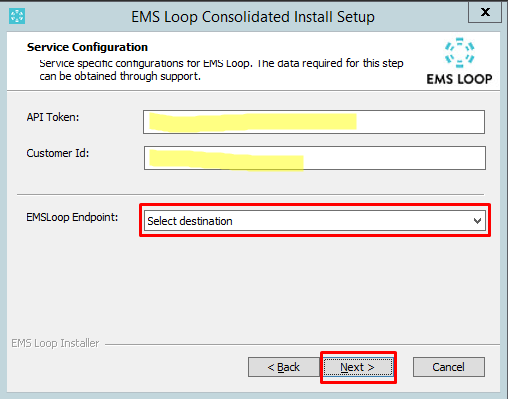
Figure 4
In the EMSLoop Endpoint drop down you will select “Production” unless directed to select another option from support. Once you have selected “Production” and have entered your API Token and Customer ID click on “Next” to continue the installation.
You’re now ready to finish the install, as seen in Figure 6 click the install button to continue.
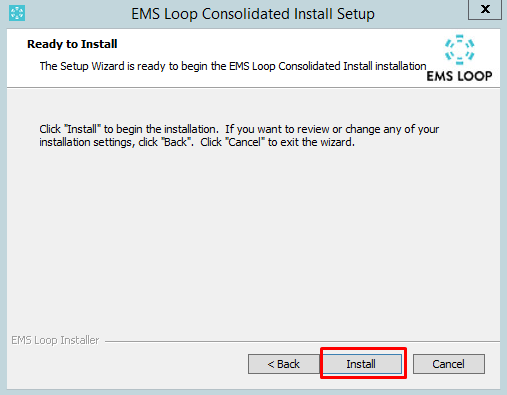
Figure 5
Your installation is now complete, click Finish as shown in Figure 7 to launch the configuration tool.
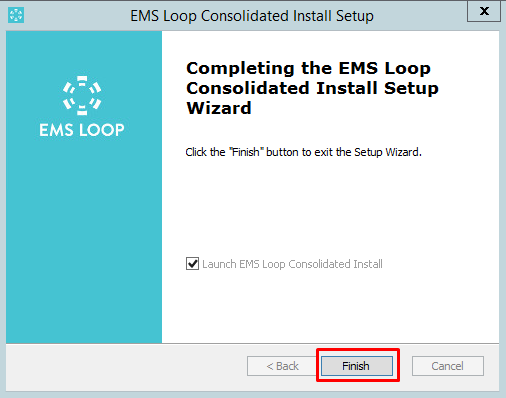
Figure 6
The installation will launch the EMS Loop Configuration utility once the installation is complete. This will allow you to configure your system with the proper settings.
The EMS Loop Windows services are NOT started automatically. You will need to start them once your system is configured either though the EMS Loop Configuration Utility or via the Windows services panel.
